
Building a center console for your boat, whether as a replacement for one that was harmed or simply worn out, is similar to building a box. The top of the boat slants toward the back of the boat to drain any water that overflows the sides and splashes onto the console. The difference is that one side and the top can be removed for access to the interior. The project is finished with fiberglass covering and caulked seams. Make a plan first, figuring in the size of the new center console.
Nine DIY Boat Center Console Plans
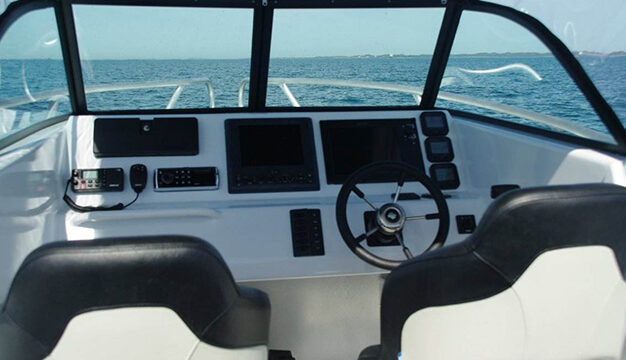
DIY Boat Steering Console Rock Lobster
The steering console on your 24 foot boat can be built using this boat steering console plan. You must put together a number of two by two frame combinations on this plan. The frames should be properly sized and well-sanded. For your project, 8/8 plywood is the ideal face to take into account. A quarter-inch cut should also be made to the plywood’s sides. If you possess a fiberglass boat, always use 4 oz cloth.
Do you desire a better, more refined fiberglass finish? Pouring the resin onto the supplied cloth is the best course of action. Spreading it out requires a small plastic squeegee, which is essential. If you purchase a small resin paint roller, you will find it simple to smooth it out. Some people have complained that it covered the entire surface.
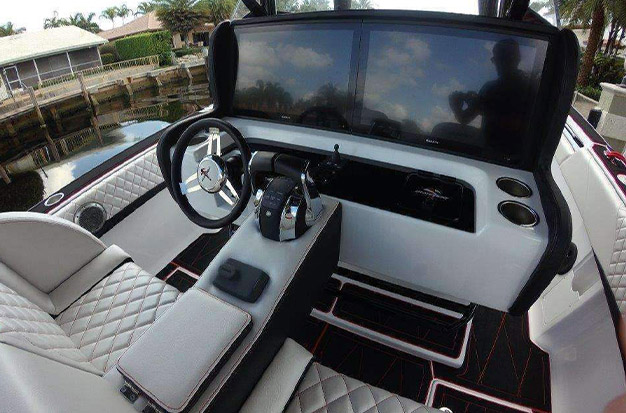
Aluminum Boat Console Plans Bodole
To build this boat steering console, you’ll need some simple carpentry tools. Before beginning the project, be sure to have silicone caulk and wood screws on hand. Additionally, making a sufficient plywood purchase is advised. If you want to complete the project successfully, you will need lumber and several cushions. Cut out the desired patterns in the plywood to start. It would be preferable if you thought about cutting at least 24 inches center to center intervals for this particular project.
A circular saw is recommended for cutting the side panels. Don’t forget to measure precisely so that your boat’s steering console operates more effectively. The size and quantity of side panels that will be used should be decided by you, the boat owner. You can get precise measurements with the measuring tape, and you can drill precise but shallow holes with the drill.
Todd Steering Console For Inflatable Boats
Most inflatable boats can be perfectly fitted with this boat steering console. A storage space and a grab rail can be added in a creative way. 32 inches in height and 16 inches in width should be the ideal measurements. Before cutting the side panels, use a measuring tape. To ensure you achieve the desired level of accuracy when working on your project, you can do it with a friend. Additionally, use medium wood screws to firmly secure the side panels. To increase durability, the plywood should be thick and the wood pieces should be well-sanded.
Build Your Own Boat Steering Console
Preparing a console deck and a few pieces of side panels should be your first step in executing this plan. Use soft plywood that has been thoroughly sanded to create side panels of high quality. The side panels should be shaped so that they can stand alone. The exterior of the boat’s steering console can be built using two medium-sized side panels. A deck coaming at the bottom needs to be bent so that it perfectly fits the outer casing. Place the thin plywood door coaming outside the deck coaming. You can open the door easily thanks to the door coaming. It must be sliced out of plywood made of lightwood.
This strategy makes use of an aluminum pipe obtained from a reputable conduit. Aluminum used in this design is a soft, weldable type. As a matter of fact, sewer plants frequently use it. Use an epoxy primer that has been approved for use with aluminum if you want to prime your aluminum material. If so, you can be sure that the boat steering console you choose will be sturdy and appealing enough to be used on any boat.
Center Console Boat Project
Start by creating a larger board by using the scraps of foam and glue. Due to the mat’s location near the place where the foam gets its structure, you should be confident that this won’t affect strength. Even though the size of the boat should dictate the steering console, 4 by 3 inches is the ideal size. In this project, plywood is useful for the faces. You only need about 10 5 gal buckets of resin or glass for this project, so don’t worry about the quantity. The result will be substantial financial savings for you.
If you use high quality ply wood instead of adding additional glass panels to stiffen things up, you’ll be doing it right. Thus, cutting is made simple. Better screw holding is possible with plywood of higher quality. Alternately, if you know that the molds are of lower quality than you would like, you can forego the gelcoat altogether. No finishing is necessary because you will have to sand it off afterward. Rather, conceal it by using body filler.
DIY Center Steering Console
Every side panel’s leading edge needs to match the height of the front panel in order to be balanced. When compared to the height of the forward panel, the panel edges are typically three inches shorter. Utilizing the included screws, fasten the angle braces to the wall. This ought to be ¾ inches away from the panel’s sides. Once that is done, it’s time to fasten the sides to the right angle braces. Make sure the front panel and side panels are next to each other and have an even top and bottom as you work.
Repeat the process with the drill on the right side of the panels after making five or four holes. To attach the side panels to the actual panels, use a few wood screws. The length of each screw that is used should be 1.25 inches. It’s time to set the dashboard now that the steering console has been finished. Placing it on the angled end of the console is the proper way to do it. Make sure the dashboard is firmly fastened to the panel edges. Six 1.5-inch-long wood screws are appropriate in that situation.
Home-Made Steering Console By Tinboats
You can construct this boat steering console using the shell of an old steering console that you no longer use. You can also add a gauge panel in addition to the steering and throttle. These are all ideal for this strategy because you can always open the throttle while maneuvering around the hull. In particular when you are operating alone, this boat’s steering console will serve as both a bug and a wind deflector.
The steering console of a boat can be made out of a toolbox if you don’t have a shell. If you don’t have access to high-quality mahogany wood, this will be extremely important. Therefore, you don’t need to be concerned about that. Cut roughly eight boards to the proper dimensions. Stain the boards with cherry-flavored paint. On the sides of the panel and the floor, mount an aluminum angle.
The legs will be constructed with a longer dimension, as shown on this boat’s steering console. Once more, they should be cut to the desired install height.
Aluminum Steering Console For Boats Homemade
The steering wheel is part of the sturdy aluminum console. Any type of boat, including inflatable boats, can use this steering wheel. The steering wheel is tough and capable of handling rough water conditions. All you need to assemble this steering console is plastic material, several pieces of cloth, and a steering wheel. A shell console that isn’t being used can serve as the steering wheel. Make sure to cut the plastic material according to the diagram below in the proper pattern if you want the best steering console. For the steering wheel to fit, the cuttings should also be precise. You can use the cut plastic material to attach the steering wheel to create a working boat steering console.
Central Steering Console DIY Plan
Despite the lack of a windshield, this boat’s steering console has a grab rail. The cut out is eight inches wide. In contrast, the height is 11 inches. Additionally, the instrument panels have a width of 14 inches and a height of about 3 inches. It’s important to note that the steering wheels and gauges are not included. If you have a steering wheel, the steering console can also be constructed at home. You also need plywood or mahogany wood to make the side panels, which are additional essentials. Making wooden doors will allow you to have a storage space on the boat’s steering console.
How Are Boat Center Consoles Made?
Items You Will Need
- Measuring tape
- Circular saw
- Marine plywood
- Rright-angle braces
- Drill
- 5/8-inch tapered drill bit
- No. 5 wood screws, 1.25 inches long
- Marine epoxy resin
- Fiberglass mat
- Gloves
- Safety glasses
- Putty knife
- 320-grit sandpaper
Instructions
Step 1: 3/4-inch marine plywood was used to measure and cut the console’s top panel. A sheet of 3/4-inch marine plywood was used for the console’s forward panel, which was measured and cut. Make sure the forward panel’s height and width match those specified by the console plans. A sheet of 3/4-inch marine plywood was used for the console’s back panel, which was measured and cut. The width of the rear panel should match the width of the front panel, but the height of the rear panel is 3 inches smaller than the height of the front panel.
Step 2: To create the side panels of the console, measure and cut two pieces of 3/4-inch marine plywood that are the same size. Make sure the width of the panels matches the intended center console’s depth. Plan for each piece’s forward edge to be equal to the console’s intended height, or the height of the forward panel. Three inches separate the height of the back edge of the panel from its height in front.
Step 3: Use the screws included with the braces to attach five right-angle braces, one at a 3/4-inch distance from the edge of each front panel side, to assemble the console. In order for the face of each side panel to be even with the outer side edge of the front panel and the top and bottom of each side panel to be even with the top edge of the front panel, attach the sides to the right-angle braces.
Step 4: Align the left edge of the rear panel with the left side panel’s rear edge. A 5/8-inch tapered drill bit should be used to make four holes that extend from the edges of the side panels through the rear panel on each side. 1.25 inches should be drilled into each hole. For the right side of the back panel, repeat this process. Attach the rear panel to the side panels using No. 5 wood screws, each 1.25 inches long.
Step 5: Place the top panel, the dash board, on the console’s angled end while holding it upright. By securing the front edge of the dashboard to the console’s front panel with duct tape, the dashboard will remain in position. Use a 5/8-inch tapered drill bit to make four 1.25-inch-deep holes into the console’s edges, one on each side of the dashboard. With No. 2, fasten the dashboard to the console’s panel edges. 5 wood screws, each 1.25 inches long.
Step 6: Remove the back console and mount the finished center console to the boat. Apply marine silicone caulk to all of the console’s seams on the front and side panels. Rear panel removed. All controls and instrument openings should be drilled and cut.
Step 7: On the pedestal’s exterior surfaces, apply marine epoxy resin. Place sheets of fiberglass mat on the resin and press the sheets into the resin with a putty knife. After giving the fiberglass an hour to cure, add more resin and fiberglass mat and repeat the process, using 320-grit sandpaper to smooth out each layer of fiberglass as you go. Repeat this process three times to add three layers of fiberglass. Utilize 320-grit sandpaper to refine the finished surface.
Conclusion
If you have the right tools and when you follow the instructions in the plan, building a boat steering console is a simple task. You can now easily construct a boat steering console after reading the aforementioned plans. We trust you enjoyed the aforementioned article. If you thought this article was useful, please share it. You can also ask our team any questions you may have about creating a boat steering console, and we will respond to you right away. Thank you and see you later!
